Save the .jar file on the local file system. If you received the tests by email, it is possible that your email client does not show the correct file name, marking the assignment as a normal (e.g. binary file); then you can save the binary file as test.jar.
Copy&Paste or Drag&Drop the .jar file into the project to be tested Now the file appears in Eclipse as a normal file represented with the icon ![]() ; We need to add the .jar file to the project classpath
; We need to add the .jar file to the project classpath
Right click on the .jar file, select Build Path and then Add to Build Path.

Now the icon of the file jar should have been turned into ![]() indicating the file has been added to the project classpath.
indicating the file has been added to the project classpath.
It the JUnit library is not yet present it should be added
Right click on the project, select Build Path and then Configure Build Path. 
The new entry dialog appears, select JUNIT_HOME and the click on the Extend… button

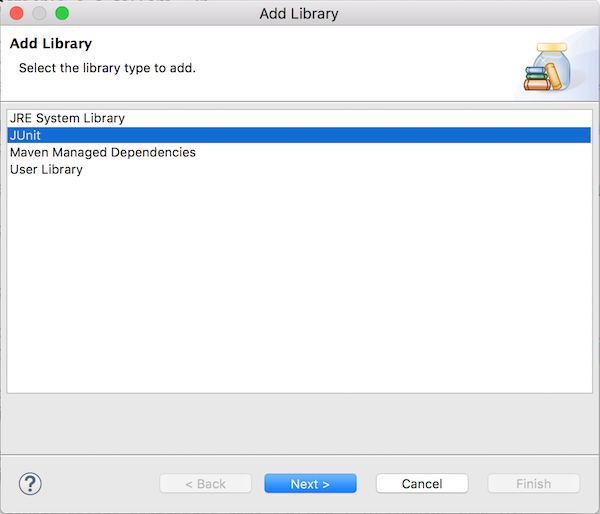
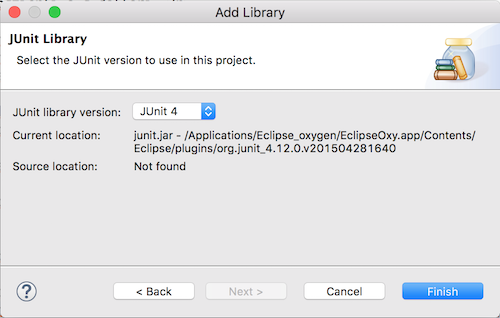
Select the item JUnit and click Next, the version selection dialog appears

Select JUnit 4 and click Finish
Now the JUnit library should be present in the properties window.
